One Down, Two to Go

Last weekend was our local quilt show, the Watertown Quilt Festival. It seemed to go very well, and I was busy both days. So busy that I didn’t get out of the booth much to take photos. But I did get a few. Our theme this year was “Everything Old is New Again”, and Paula did a wonderful job decorating with antique pieces. Look how cute the stage was:

The two quilts in the background are ones the guild made to donate to various causes such as Make a Wish or charity fundraising auctions.

Our guild members did a mystery quilt for our spring retreat in May. About 25 people signed up to participate, and we had 14 finished mystery quilts in the show!! Good job, ladies!

Here are a few views of my booth:

These are the blocks that were entered into the block contest. They will be assembled into a top to create next year’s raffle quilt.

Our show is not judged, but we do have the attendees vote for their favorite quilt. This year’s Viewer’s Choice was a Bargello quilt by one of my customers, Renae. I was so happy for her, she did a beautiful job on the quilt. Here we both are with her ribbon-winning beauty…..and no, we did NOT plan to wear clothing that matched the quilt – it just worked out that way!

And here’s a closeup of some of the quilting:

That’s the last show for this year, now I just have a few quilting retreats coming up.

Quilting Season has Arrived!

While the end of summer always makes me sad, the shorter days and less time in the out-of-doors means there is more time for sewing and quilting – YAY!! September and October are always filled with quilting events – shows, retreats, classes, etc. Now that I have my Studio, I can’t attend as many of these as I used to. Just this month, for instance, are several events I’ve attended in the past. Last weekend was the Hill City Quilt Show and The Great Black Hills Quilt Escape in the Black Hills of S. Dakota. This weekend the South Dakota Quilter’s Guild is holding their Fall Quilting Retreat in Huron. Next weekend is the Indian Summer Quilt Show & Conference held in Fargo ND.

The first weekend in October is our local show, the Watertown Quilt Festival hosted by the Magic Needlers Quilt Guild. This is this year’s raffle quilt:

If you want to know more about how the raffle quilt was made, you can read this post.

The second weekend in October is the AQS Show in DesMoines, IA. A friend and I were planning on going but decided we had too much else going on to attend. However, the last weekend in Oct. we will be attending a three day quilting retreat not too far from home.

I enjoy attending both shows and retreats.

Shows energize and excite me.

The quilts inspire me to try new things, consider different color combinations, strive to improve my techniques. The vending booths contain all sorts of fabrics and patterns and notions and doodads just crying out to be taken home and given a whirl. (And those demonstrators make everything look so easy – I can be proficient and artistic and efficient if I just buy their product!!) Spending time with the bigwigs and stars of the quilting industry, in a class or a lecture, keeps me amazed at how inventive and creative some people can be. I’m never sure if I should feel inspired by what they’ve achieved or depressed that I’ll never produce something half as beautiful!

Some retreats are similar to a show, with the whirlwind of running to this and that event, but the ones I like best are more relaxed.

We arrive when we want, with most of the contents of our sewing room in tow. There is no real schedule other than when to eat. Otherwise, we do what we want. Sleep late, or get up early. Spend time during the day napping, or reading or walking in between sewing, or sew the entire time. Finish an old project or start something new. This is the time I can be most productive. All those projects I’ve started in a class, and never had time to finish, can get completed. Those items I bought at the vendor mall at a show can be tested and tried. And although we don’t have formal classes during this retreat, I’ve always learned something. Someone shows a new ruler or gadget. Another shares a different way to applique. Look at the great pattern someone found at the last show they attended. Did you see this method of doing binding?….or mitered corners?….or…….the possibilities are endless. And the easy companionship of spending time with like-minded individuals is good for the soul – who else will “ooh and aah” over your latest creation?

So are you attending any shows or retreats this fall? Do you have a favorite?

Tuesday Tip – Making Bias Binding Part 2

First I need to apologize for the quality of the photos. I thought if I used a plaid fabric, it would be easier for you to see what was bias and what was straight of grain. This was a rather small woven plaid, and unfortunately, digital cameras don’t like them very much and make them come out looking like moire instead of plaid. Hopefully you can get the idea, though.

Once you’ve determined how big a piece of fabric you need, we’ll fold it so it’s easy to cut. First press it to remove the fold that’s formed when the fabric is doubled on the bolt. Then re-fold, lining up the selvages so the two layers of fabric lay smooth and flat with no puckers. The cut edges will probably NOT be even – don’t worry about that, just trim them off so they are even and perpendicular to the selvages. You DON’T really have to start with a square of fabric (it can be a rectangle), but you DO want the sides to be at a 90 degree angle to the selvages.

CORRECTION – AAAACCCCKKKK! I left a step out. You only fold selvage to selvage to trim the cut edges perpendicular to the fold/selvage. Then you need to unfold again before the next step!!! I had my photos correct, but left out that sentence in my written instructions.

AT THIS POINT YOU SHOULD ONLY BE WORKING WITH A SINGLE LAYER OF FABRIC!!! Now take the top right corner and bring it down and to the left, aligning the edges along the bottom. This should give you a nice 45 degree angle (see how it matches up with the 45 degree angle mark on my mat?).

Then bring the bottom right corner up and to the left along the 45 degree fold you just made.

It’s still too big to cut comfortably, so bring that bottom right fold up over itself:

And the extra little ‘flappy thing’ at the top gets folded also:

You can fold again if needed to have a nice neat package. Basically you just need to get it small enough to fit the size ruler you’re going to use.

I’ve now rotated the package 45 degrees clockwise, this will make it easier for me to cut.

Then I trim off the fold:

And start cutting my 2-1/2″ binding strips:

And voila – perfect bias binding strips!

I used to use the ‘tube’ method where you sewed one long seam to make a tube, then marked and cut the tube into a continuous piece of bias binding. I was never all that happy with that method – seems like I had to do a lot of ‘fiddling’ to make it come out right. So now I prefer this way. How do you like to make bias binding?

Quilting Studio Tour

If you couldn’t make it to my Quilt Market Review on Saturday, would you like to now join me on a photo tour of the Studio?

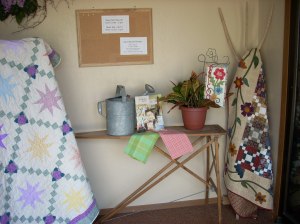
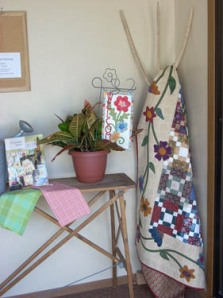
Here is the front entryway:

Front Entryway

Don’t you love the hayfork? I found that in an antique store in Missouri a few years back:

Hayfork

This is the view that greets you as you come in the door to the Studio:

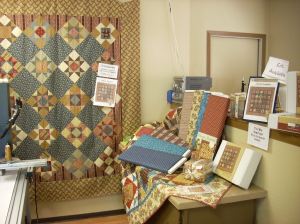
As you look to the left, you come to the “Civil War Corner”:

Civil War Corner

A closer look (hmm, I didn’t know they had stereos like that back then <grin>):

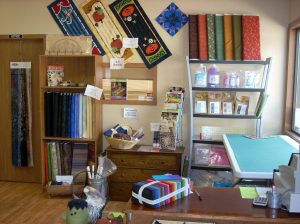
Looking across the room reveals more fabric, patterns, and Paintstick supplies & samples:

And to the right more books and the “Twirling Tulips” sample:

Let’s go into the back room now for some refreshments:

And while you’re snacking you can see a demo of the AccuQuilt GO!

or browse through some new books and lines of fabric:

Finally, if you need to sit for a while, maybe you would like to help me sew some blocks for this sample that isn’t quite finished yet?:

Thank you again for coming, whether in person or in a virtual visit. I hope you’ll come back very soon!

WOW!

WOW!! Thank you so much to all who came to my Quilt Market Review event today! For a while it seemed like we might need to have folks take a number and wait to get inside!! I hope you enjoyed visiting my Studio as much as I enjoyed having you. I especially appreciate those of you who drove 30 or 50 or more miles to attend. And I’m sorry if I didn’t get to personally spend time with each of you, but hopefully my *extremely* underpaid  but very capable assistants Betsy, Becky and Roxy were able to answer your questions. (I’m lucky they’re willing to work in exchange for being the first ones to fondle my new fabric LOL.) Thanks, gals, you’re the best!

Some of the items I had either were not available yet, or sold out early in the day. For those who filled out the Wish List sheets, I’ll let you know as soon as the items you indicated become available. Don’t forget the special savings on the AccuQuilt GO! will be available for all orders placed by Friday, June 11. Call or email if you have any questions on anything you saw today.

I’ll post some photos tomorrow for those of you who couldn’t join me in person, but for now it’s time for bed…..

Tuesday Tip – Working With Fusible Applique

I was working on a fusible applique project today.

(If you’re new to fusible applique, here’s the short course on how it works – you trace the shape you want on the paper side, then iron that to the wrong side of your fabric. Cut the shape out along the drawn line, then remove the paper backing. Now the fusible glue is on the wrong side of your applique, and you can fuse it to a background fabric.)

Anyway, some of the pieces were skinny little letters, with parts that were less than a quarter inch wide, and I was struggling to remove the paper backing.

The fusible wanted to come away with the backing, and the edges of the letters were getting frayed. So were my nerves…..

Then I tried something new. I traced off a new letter. Fused it to the fabric. But I didn’t cut it out. I peeled the paper backing off first. (By the way, did you know if you take a straight pin and score the paper in the center of the unit, you can then grab and peel the paper from there, instead of starting at an edge where you run the risk of fraying?)

So I bet you’re wondering how I’m going to cut the shape if I no longer have the drawing to follow? Well, you know how that paper has a lot of static and wants to cling to your fingers? It will also cling back to the piece of fabric you just removed it from. I just placed it back on top and held on carefully while I made my cuts:

(Another tip – I like to cut my inside details out first, while there’s still a lot of the shape to hold onto. Then I’ll do the larger outside cuts.)

It worked really well! Look at how nice and neat these letters turned out – and notice the size from the ruler on my cutting mat!

Now the next big question is…..what on earth am I working on that I need to spell “EEL” on my project???????

Stay tuned, I’ll try to post a photo of it tomorrow.

Tuesday Tip – Taming the Stash

During my Stashbusters Club last year, one of the things we learned was how to tame those leftover bits and pieces from quilting projects. In the past I when I had finished cutting out what I needed for a quilt, I threw the leftover strips and pieces in a basket, thinking I would use them in a future quilt. But you know what??? All they did was multiply in that basket and get all wrinkled and tangled.

So when it came time to use them in a project, I didn’t want to take the time to sort and press and cut to size.

Now what I do is cut the leftovers into the largest useable pieces I can. If I can get a full strip, I cut it to the largest half-inch increment possible – 1-1/2″, 2″, 2-1/2″, etc. up to about 6-1/2″. The size you cut is up to you, think about what sizes you use the most.

If it’s an odd sized piece, I cut it into squares or rectangles – again think of the sizes you use most – 5″ squares will work for nickel or charm quilts, 3-1/2″ x 6-1/2″ rectangles can be the start of a flying goose block……you get the idea. Don’t you think you’d be much more inclined to use these pieces in a quilt?:

I also sort them by color or type, so if I decide I need some 5″ blue squares, or some Christmas prints, I can grab them at a glance. I store them in a bin like you see above, or empty (clean!) pizza boxes work well too. If you have room for a drying rack, you can store strips on it:

It’s much easier to cut up that last little bit of fabric as you go, then try and do a whole bunch of it at one time.

What tips do you have for taming your stash???

If you don’t yet have much of a stash, visit the website where I now have fat quarters on sale for just $1.50 and $1.75 – a great excuse to add to your stash!!

Tuesday Tip

I’m going to try and post a quilting tip for you each Tuesday. (Notice the operative word here is *TRY*…..I didn’t say promise, now did I? 😉 But we’ll see how it goes. )

Before cutting out all the pieces for a new pattern, it’s always a good idea to cut and sew one block to be sure the directions are correct and that your cutting and sewing will yield a block the proper size. It’s much easier to fix a problem with one block than an entire quilt. For instance, if the directions are correct but your block is coming out a bit small, you know you will need to use a slightly smaller seam allowance for future blocks.

If you don’t want these blocks to be wasted, choose a color scheme or theme (like Christmas, Patriotic, 30’s Reproductions, blue & white or whatever floats your boat), and always make your test blocks from those fabrics. Store them away in one spot (a new *unused* pizza box make a good hide-away), and before you know it, you’ll have enough blocks for another quilt. A bonus quilt – how cool is that???

Think Spring!

It was a long hard winter here, and spring was slow in coming. While it’s finally starting to feel that way in the last week, I was bemoaning the cool temps and cloudy days last month.  I was craving some flowers and bright colors…..

So if I couldn’t have them outside, I decided to have them in my studio.

Aren’t these stinkin’ cute???!!!??? These are kits I made for the quilt in the background……

Several years back I designed a quilt I called “Twirling Tulips”. I had taught this as a class, but never published the pattern. I decided it was finally time to do that, so I made a new version of the quilt, and finally wrote the pattern. (To be honest here, *I* didn’t make the top. I picked the fabrics and supplied the directions, but my friend Betsy did the sewing – thanks, Betsy!). The fabric line is called “Boutique” by Moda, and this is the piece I chose for the border:

And here is what the entire quilt looks like:

Hope this brings a little Spring into your life!

Studio Progress

Remember what the studio looked like last time I showed it? I rearranged already 😉

Then did a little destruction at the old studio:

Oh, no, what happened to my Prodigy???


And added a few things to the new studio:

I’m even working on my second customer quilt on the new machine! Oh, and it’s now easier for people to find me:

I took that as I was driving away today, I’ll have to try for a better shot without all the glare. But if you look really hard, you can kinda see me in the photo 😉 .